After the challenge of getting oneself some decent EEG electronics, the next hardest part is getting some decent EEG electrodes. Sure, there are lots out there that can be bought, but some folks have no interest in paying
$8-
$20 per electrode (plus shipping) because they know that they need to buy 6-10 of these electrodes and, well, that becomes a lot of money. So, I decided to try to build my own homemade EEG electrodes. Here's my story...(and for you impatient folks...yes, there's a fairly happy ending)
 |
Wearing my homemade passive EEG electrodes.
(Beware of cheap cameras and flourescent lights) |
The Idea: Use Cheap Bits from the Hardware Drawer
When I look at passive EEG electrodes, I just see a piece of flat metal with a wire attached. Sure, I see the use of fancy metals (gold, silver / silver-chloride), but is that really necessary? For EEG research or EEG medicine, the quality and repeatability provided by the fancy metals is necessary. For EEG Hacking? I'm not so sure. So, if an electrode is just a piece of flat metal with a wire attached, it seems like I should be able to build one myself.
I started by searching through my hardware drawer to find a suitable piece of metal that is small and flat. I found some lock washers with a solder tab (see picture below-left). It is a very basic and inexpensive component. I'm pretty sure that mine are from
Mouser and cost $0.24 each. You can probably get them cheaper.
I then grabbed a piece of wire, stripped the end, and inserted it into the tab on the washer. Looks like it'll do nicely (see picture above-right). To soldered the wire to washer, I simply placed it in my plastic-gripped vice and applied heat and solder (pics below). If you don't have a vice, a traditional "3rd hand" soldering fixture would have worked fine, too. This is not fancy work that we're doing here.
Once the wire was soldered to the washer, I realized that I should have added a piece of shrink tube over the wire to cover the solder joint. But, once it was soldered together, it was too late to add the shrink tube (the other end of my wire already had a connector on it). Dang! When I made a second electrode, I remembered to add the shrink tube on that one. As you can see below, the black shrink tube makes the second electrode look much nicer than the first one.
 |
| My First and Second Homemade Passive Electrodes. On the second one, I remembered to add a piece of shrink tube to cover the solder joint. It looks much better. |
With the working end of the electrode complete, I could consider the other end of the wire...the end where normally on would add a connector for plugging into the EEG electronics. Since I stole my wire from an old ECG lead wire, I have the "touchproof" connectors on the end of my electrodes. But, you don't need anything that fancy if you want to spend less money.
The least expensive approach for "connectors" would be to solder on a
male or
female pin header, which are only about $0.04 per connection. This kind of connection is perfect for connecting to
OpenBCI, which is built around traditional 0.1" spaced pin headers. So, if you put the mating gender of pin header on your homemade electrodes, they could plug right into the OpenBCI board. Great! Alternatively, if you use
OpenEEG, you will want to terminate your electrode's wire with
a 3.5 mm stereo phono plug. That is what the OpenEEG is built around. These pieces about $0.50 each.
So, overall, I estimate that cost of each one of these electrodes is: $0.24 for the washer, about $0.36 for a meter of
stranded wire (it's more flexible than solid wire), and $0.50 for a 3.5mm connector. That's $1.10 in parts, which is a nice reduction compared to commercially available electrodes linked at the top of this post.
But do my homemade electrodes work?
Homemade Electrodes for ECG
As discussed in my
previous post, I always like to start my testing by doing ECG measurements. Because the heart signals are so strong, it is an easy way to confirm that your EEG system (and EEG electrodes) are working to some degree. So, I got out my tube of
Ten20 conductive paste and stuck my electrode to my wrist. I attached one electrode to my left wrist and the other electrode to my right wrist.
 |
Attaching my homemade electrodes to my wrists to measure my ECG.
The shiny stuff on my skin is Ten20 conductive paste |
How well did they stick? Well, not nearly as well as the self-adhesive disposable ECG electrodes. But, the surface area on those sticky ECG electrodes is HUGE, so of course my little electrodes won't stick as well. Given how small my electrodes were, though, I think that they adhered adequately well. I think that the big hole in the middle of the washer is not helpful. If it were solid, I think that these electrodes would stick better. I'll remember that when I go to make my next set of homemade electrodes.
Once I got the electrodes attached to my wrists, I connected plugged them into my OpenBCI board and had the Arduino pipe the data to my computer, as usual. Example ECG data from these electrodes is shown below. I'm showing 6 heart beats. As you can see, the sharp R-waves and the broad T-waves are both very clear. The amplitude of the ECG is similar to what I showed in
my post yesterday when I used real ECG electrodes. So, while my signal trace does look a bit noisier than yesterday, I'd say that this is a successful test!
 |
| My ECG As Recorded through OpenBCI Using my Homemade Electrodes |
Homemade Electrodes for EEG
Since I was successful with the ECG, I made the next step and used my homemade electrodes to acquire some EEG signals. I am still pretty fixated on my
Mu waves, so I decided to use my electrodes to see if I could pick up my Mu waves.
Following a simplified version of
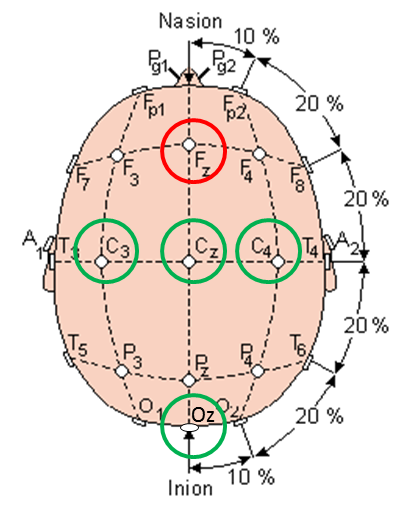
my previous procedure, I put one electrode near the top of my head near Cz and one the left side of my head near C3. As you can see in the photo, it is very tricky to accurately place electrodes on one's own head. In retrospect, it looks like the one on the top of my head was a bit too far forward for Cz and the one on the side of my head was a bit too far back and a bit too low for C3. Regardless, they should be good enough to record *something*, so let's see what I got.
 |
Placing my homemade electrodes near
Cz (top of head) and near C3 (side of head). |
Using my OpenBCI electronics, I started recording data from my brain. I spent some time with my eyes closed to generate Alpha waves (Posterior Dominant Rhythm), I spent some time with my eyes open and my right arm and hand relaxed (to hopefully generate Mu waves), and I spent some time with my eyes open and my right hand clenching and un-clenching. The results are plotted below as a spectrogram. Unfortunately, it is not very clear where the boundaries were between these different activities, so it is not clear what we *should* be seeing. We do clearly see the Alpha waves caused by my eyes being closed. In the middle of the plot, we might also see some Mu waves, but they are very weak. I would say that these results are fine for Alpha and bad for Mu.

To try to get better results, I moved the homemade electrode that was on the side of my head. I moved it a little higher to be closer to where C3 is supposed to be. Then, I repeated my recordings. This time, I pressed a button on my computer to mark the boundary between each activities to make my post-test analysis easier. It turns out that the simple act of pressing the button caused my EEG wires to jiggle, which shows up as artifacts within the data. It makes it clear when I shifted my activity. See the results below.
As before, the Alpha waves are quite clear. This time, though, I do think that I see Mu waves during those periods when my eyes were open and my hand and arm were relaxed. Then, when I moved my hand, I think that I see that the Mu waves go away. That's exactly what should happen! At the end, when I relax again, I think that it is interesting that it takes a while for my Mu waves to come back. Clearly, I am not very good at relaxing. That's not much of a surprise to me. I can be quite excitable...especially when I'm EEG HACKING!
Homemade Electrodes Seem to be Good!
So, with this second test, I'm quite pleased with my homemade electrodes. The signals that I recorded were pretty good. There was a lot of 60 Hz noise (not shown in these graphs) but that could be due to me not using the traditional 3rd electrode connection (variously named the "bias" or "driven ground" or "driven right leg") for these recordings. I also felt that these electrodes did not stick to my head as securely as the gold electrodes that I used previously. I think that the stickiness can be improved by using a piece of metal with more surface area...maybe a regular flat washer instead of the skinny lock washer. Still, for about a dollar per electrode, I think that the results are pretty darned good. I'm pleased.
How about you...have you made your own electrodes before? How did you do it? Did they work?
Follow-Up: More graphs and discussion of the data is in
this post
Follow-Up: Want to see my data from this experiment?
Check out my github!